11.1 유닛 테스트와 E2E 테스트
유닛 테스트
- 가장 일상적으로, 가장 낮은 수준에서 수행하는 테스트.
- 함수, 훅, 모듈처럼 특정 작업을 수행하는 코드 단위를 검증
- 테스트 주도 개발(TDD) 방법론에 따라 유닛 테스트를 적용하면 표준 개발 관행에 부합
TDD란?
- 테스트 케이스를 먼저 설계 및 작성(적섹 페이즈)
- 테스트를 만족시키는 코드를 구현(녹색 페이즈)
- 구현 결과를 개선(리팩터링 페이즈)
통합 테스트
- 다양한 코드 단위 블록을 통합적으로 검증하는 테스트
- 로직 기능, 컴포넌트, 모듈의 흐름 확인
- 컴포넌트 테스트는 내부 로직과 유닛 테스트를 함께 검증하는 테스트
- 테스트 품질을 확보하기 위해 업스트림 서비스와 각종 외부 기능들을 모의(mock)
엔드투엔드 테스트
- 실제 사용자의 행동을 시뮬레이션하며 클라이언트부터 백엔드에 이르는 전체 흐름 검증
- 대체로 모의 서비스나 기능을 필요로 하지 않음
11.2 Vitest와 유닛 테스트
프로젝트에 dev 의존성을 설치하여 사용
// package.json
"script": {
	"test": "vitest"
}
터미널에서 yarn test를 실행하면 파일명에 .spec 또는 .test가 포함된 파일을 자동으로 감지
watch 모드 실행, 단일 실행 모드 선택 가능
11.3 Vitest 파라미터와 설정 파일
특정 폴더 하위 test하도록 vitest에 인수 전달
// package.json
"script": {
	"test": "vitest --root src/tests"
}
또는 yarn test 명령어
yarn test src/tests/useFetch.test.tsVue 프로젝트의 DOM 환경을 설정하지 않으면 기본적으로node 환경으로 선택되는데 이는 UI 컴포넌트 상호작용 테스트에 적합하지 않으므로 JSDOM으로 지정해준다
// package.json
"script": {
	"test": "vitest --root src/tests --environment jsdom"
}
또는 vite.config.js 파일 수정
/// <reference types="vitest" />

export default defineConfig({
    test: {
    	environment: 'jsdom',
        root: 'src/tests,
        globals: true,
    }
})
Vitest API를 전체 프로젝트에 전역 모드로 지정하기 위해 globals 플래그 설정 후 tsconfig.json 파일에 정의 추가
//tsconfig.json
"compilerOptions": {
	"types": ["vitest/globals"]
}
11.4 테스트 작성
import { it, expect} from '@vitest'

it('테스트 제목', () => {
    // 객체나 배열의 값을 재귀적으로 비교, 구조만 같으면 통과
    expect(메서드).toEqual(기댓값)
    // 엄격한 비교(===) 수행. 값과 자료형이 모두 동일해야됨
    expect(메서드).toBe(기댓값)
    // 값이 truthy한지 (즉, 논리적으로 참인지) 확인
    expect(메서드).toBeTruthy(기댓값)
    // 값이 falsy한지 (즉, 논리적으로 거짓인지) 확인
    expect(메서드).toBeFalsy(기댓값)
    // 배열 또는 문자열이 특정 항목을 포함하는지 확인
    expect(메서드).toContain(기댓값)
    // 배열이나 문자열의 길이를 확인
    expect(메서드).toHaveLength(기댓값)
    //값이 정의되어 있는지 또는 정의되어 있지 않은지 확인
    expect(메서드).toBeDefined(기댓값)
    expect(메서드).toBeUndefined(기댓값)
    // 값이 null인지 확인
    expect(메서드).toBeNull(기댓값)
    // 문자열이 정규표현식 또는 특정 문자열 패턴과 일치하는지 확인
    expect(메서드).toMatch(기댓값)
    // 함수가 실행될 때 예외를 던지는지 확인
    expect(메서드).toThrow(기댓값)
    // 숫자가 특정 값보다 큰지 또는 작은지 확인
    expect(메서드).toBeGreaterThan(기댓값)
    expect(메서드).toBeLessThan(기댓값)
})
1. 적색 페이즈
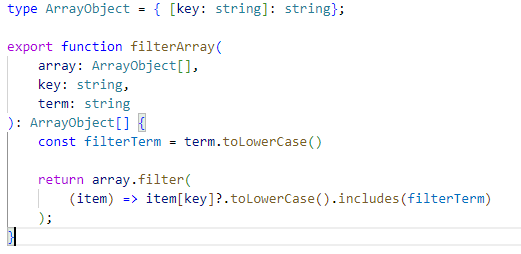
utils/filterArray.ts, tests/filterArray.test.ts


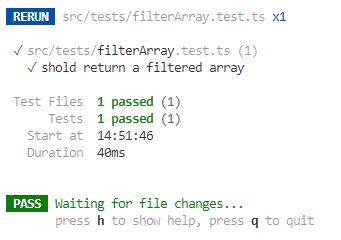
2. 녹색 페이즈
describe()를 사용한 계층 구조 형태로 정리(그룹화)
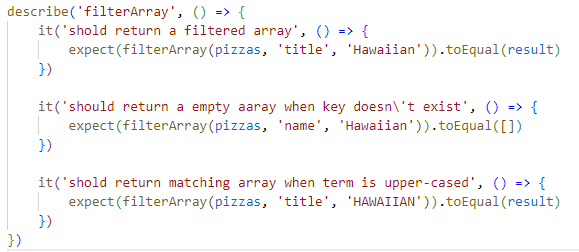

it(), expect() vs test(), assert()
- it()의 제목은 'should do something' 형식에 맞추어 일관된 문장으로 정의
- test()는 의미가 담긴 어떤 제목이든 정의 가능
11.5 비-라이프사이클 컴포저블 테스트
ref, watch, reactive, provide 등의 API를 사용하는 컴포저블도 동일한 방식으로 테스트 가능
composables/useFilter.ts
import { ref, computed, type Ref } from 'vue'

type ArrayObject = { [key: string]: string }

export function useFilter(
    arr: Ref<ArrayObject[]>,
    key: string,
    term: string
) {
    const filterBy = ref(key)
    const filterTerm = ref(term)
    const order = ref('asc')

    const filteredArray = computed(()=>
        arr.value.filter((item)=>
            item[filterBy.value]?.toLowerCase().includes(
                filterTerm.value.toLowerCase()
            )
        ).sort((a, b)=> {
            if (order.value === 'asc') {
                return a[filterBy.value] > b[filterBy.value] ? 1: -1
            } else {
                return a[filterBy.value] < b[filterBy.value] ? 1: -1
            }
        })
    )

    return {
        filterBy,
        filterTerm,
        filteredArray,
        order,
    }
}
tests/useFilter.test.ts
import { useFilter } from "@/composables/useFilter";
import { it, describe, expect } from "vitest";
import { ref } from "vue";

const books = ref([
    {
        id: '1',
        title: 'Gone with the wind',
        author: 'Margaret Mitchell',
        description: 'A novel set in the American South during the Civil War and Reconstruction'
    },
    {
        id: '2',
        title: 'The Great Gatsby',
        author: 'F. Scott Fitzgerald',
        description: 'The story primarily concerns the mysterious millionaire Jay Gatsby'
    },
    {
        id: '3',
        title: 'Little women',
        author: 'Louisa May Alcott',
        description: 'The March sisters live and gorw in post-Civil War America'
    },
])

const result = [books.value[0]]

describe('useFilter', () => {
    it('sholud reactively return the filtered array when filterTerm is changed', () => {
        const { filteredArray, filterTerm } = useFilter(books, 'title', '');

        filterTerm.value = books.value[0].title
        expect(filteredArray.value).toEqual(result)
    })
})
11.6 라이프사이클 훅 컴포저블 테스트
composables/useFetchOnBeforeMount.ts
import { onBeforeMount, ref } from 'vue'

export function useFetchOnBeforeMount(url: string) {
    const data = ref(null);
    const loading = ref(false);
    const error = ref(null);

    const fetchData = async () => {
        try {
            loading.value = true;
            const response = await fetch(url);

            if(!response.ok) {
                throw new Error(`Failed to fetch data for ${url}`)
            }

            data.value = await response.json()
        } catch (err: any) {
            error.value = err.message
        } finally {
            loading.value = false;
        }
    }

    onBeforeMount(fetchData);

    return {
        data,
        error,
        loading,
    }
}
tests/useFetch.test.ts
import { createApp, type App } from 'vue'
import { useFetchOnBeforeMount } from '@/composables/useFetchOnBeforeMount'
import { describe, it, expect, beforeEach } from 'vitest';
import { vi } from 'vitest';
import { flushPromises } from '@vue/test-utils'

// Vue 컴포넌트 생성과 마운트 단계 재현
function withSetup(composable: Function): [any, App<Element>] {
    let result;

    const app = createApp({
        setup() {
            result = composable()
            return () => {}
        }
    })

    app.mount(document.createElement("div"))

    return [result, app];
}

describe('useFetch', async () => {
    // fetch API mock 생성, 다른 테스트 스위트로부터 명확히 격리하기 위해 describe 내부에 선언
    const fetchSpy = vi.spyOn(global, 'fetch');
    beforeEach(() => {
        // 테스트 케이스 실행 전에 모의 구현과 값을 모두 초기화
        fetchSpy.mockClear()
    })

    it('should fetch data from the given url', async () => {
        fetchSpy.mockResolvedValueOnce({
            ok: true,
            json: () => Promise.resolve({ data: 'test'} )
        } as any)

        const [result, app] = withSetup(() => useFetchOnBeforeMount('your-test-uri'))

        // 동기식으로 진행되는 라이프사이클 훅이 비동기 API 호출을 기다리도록 해줌
        await flushPromises();

        expect(result?.data.value).toEqual({ data: 'test' })

        await app.unmount();
    })
})- Vue 컴포넌트 생성과 마운트 단계 재현을 위한 withSetup 생성
- API통신 목업 데이터 생성을 위한 fetchSpy 사용
- 라이프사이클 훅의 API 비동기 호출 처리 문제 해결을 위한 flushPromises 사용
다음과 같이 로딩여부나 error 반환도 테스트할 수 있다.
    it('should change loading value', async () => {
        fetchSpy.mockResolvedValueOnce({
            ok: true,
            json: () => Promise.resolve({ data: 'test'} )
        } as any)

        const [result, app] = withSetup(() => useFetchOnBeforeMount('your-test-uri'))

        expect(result.loading.value).toBe(true);

        await flushPromises();

        expect(result.loading.value).toBe(false);

        expect(result?.data.value).toEqual({ data: 'test' })

        await app.unmount();
    })

    it('should change error value', async () => {
        // rejectedValue
        fetchSpy.mockRejectedValueOnce(new Error('test error'))

        const [result, app] = withSetup(() => useFetchOnBeforeMount('your-test-uri'))

        expect(result.error.value).toBe(null);

        await flushPromises();

        expect(result.error.value).toEqual(new Error('test error').message);

        await app.unmount();
    })
11.7 Vue 테스트 유틸로 컴포넌트 테스트하기
- Vue 엔진은 Vue 컴포넌트의 설정에 따라 브라우저 DOM에 컴포넌트 인스턴스를 생성 및 업데이트, 관리
- 컴포넌트 테스트는 렌더링 결과가 DOM에 잘 반영되는지 테스트하는 것
- vite.config.ts 에서 test.environment를 jsdom으로 설정
- @vue/test-utils 패키지에서 mount, shallowMount 등의 메서드 사용
shallowMount vs mount
- mount 메서드에서 shallow 플래그를 활성화시킨 래퍼
- 자식 컴포넌트와 관계없이 해당 컴포넌트만 렌더링
- mount 메서드는 자식 컴포넌트까지 포함해 전체적으로 테스트할 때 사용
components.PizzaCardForTest.vue
<template>
    <div>
        <article class="pizza--details-wrapper">
            <img :src="pizza.image" :alt="pizza.title" height="200" wiedth="300"/>
            <p> {{ pizza.description }}</p>
            <div class="pizza--inventory">
                <div class="pizza--inventory-stock">Stock: {{ pizza.quantity }}</div>
                <div class="pizza--inventory-price">$ {{ pizza.price }}</div>
            </div>
        </article>
    </div>
</template>

<script lang="ts" setup>
import type { Pizza } from '../types/Pizza.ts'
import type { PropType } from 'vue';

const props = defineProps({
    pizza:{
        type: Object as PropType<Pizza>,
        required:true
    }
})

</script>
tests/PizzaCard.test.ts
describe('PizzaCard', () => {
    it('should render the pizza details', () => {
        const pizza: Pizza = {
            id: '1',
            title: 'Test Pizza',
            description: 'Test Pizza Description',
            image: 'test-pizza.jpg',
            price: 10,
            quantity: 10,
            value: ''
        }

        const wrapper = shallowMount(PizzaCardForTest, {
            props: {
                pizza,
            }
        })

        // pizza-details-wrapper 클래스가 지정된 DOM 엘리먼트의 존재 여부 확인
        expect(wrapper.find('.pizza--details-wrapper')).toBeTruthy();

        // pizza--inventory-stock 엘리먼트의 텍스트 콘텐츠 검증
        expect(
            wrapper.find('.pizza--inventory-stock').text()
        ).toBe(`Stock: ${ pizza.quantity }`);

        expect(
            wrapper.find('.pizza--inventory-price').text()
        ).toBe(`$ ${pizza.price}`);

        // shallowMount 메서드는 컴포넌트의 렌더링 HTMl이 담긴 html 프로퍼티 제공
        // toMatchSnapshot을 적용해 HTML스냅샷 검증
        expect(wrapper.html()).toMatchSnapshot()
    })
})
스냅샷 사용
- 테스트 엔진은 PizzaCard.test.ts.snap 파일을 생성하고 컴포넌트의 HTML 스냅샷 저장
- 컴포넌트 템플릿 변경 시 스냅샷 테스트 실패
- npm test -u 처럼 테스트 명령에 -u 플래그를 붙여 스냅샷을 업데이트 해야됨
- 기능적 한계가 있으므로 변경 가능성이 없는 컴포넌트에 사용하는 것이 좋음
- title을 Pineapple Pizza로 변경 시 다음과 같이 테스트 실패

다음과 같이 src와 alt 속성을 검증 가능
    it('should render the Pizza image and alt text', () => {
        const pizza: Pizza = {
            id: '1',
            title: 'Test Pizza',
            description: 'Test Pizza Description',
            image: 'test-pizza.jpg',
            price: 10,
            quantity: 10,
            value: ''
        }

        const wrapper = shallowMount(PizzaCardForTest, {
            props: {
                pizza,
            }
        })

        const img = wrapper.find('img')

        expect(img.attributes().alt).toEqual(pizza.title);
        expect(img.attributes().src).toEqual(pizza.image);
    })
11.8 컴포넌트 상호작용 및 이벤트 테스트
components/PizzaCardForTest.vue
<template>
		<!-- ... -->
		<button @click="addCart">Add to cart</button>
</template>

<script lang="ts" setup>
<!-- ... -->
const emits = defineEmits(['add-to-cart'])
const addCart = () => {
    emits('add-to-cart', { id: props.pizza.id, quantity: 1 })
}
</script>
test/PizzaCard.test.ts
    it('should emit add-to-cart event when add to cart button is clicked', () => {
        const pizza: Pizza = {
            id: '1',
            title: 'Test Pizza',
            description: 'Test Pizza Description',
            image: 'test-pizza.jpg',
            price: 10,
            quantity: 10,
            value: ''
        }

        const wrapper = shallowMount(PizzaCardForTest, {
            props: {
                pizza,
            }
        })

        const button = wrapper.find('button')
        button.trigger('click')

        // wrapper.emitted() 함수를 실행하면 이벤트 결과 정보를 맵 형태로 수신
        expect(wrapper.emitted()['add-to-cart']).toBeTruthy()
        expect(wrapper.emitted()['add-to-cart'][0]).toEqual([
            {
                id: pizza.id,
                quantity: 1
            }
        ])
})- wrapper.emitted() 함수를 실행하면 이벤트 결과 정보를 맵 형태로 수신
- ex) { add-to-cart: [[{ id: 1, quantity: 1}]] } 반환
- @pinia/testing 패키지의 createTestingPinia()로 테스트용 피니아 인스턴스를 생성해 마운트 단계에서 전역 플러그인으로 컴포넌트에 추가 가능
11.9 Vitest와 GUI
@vitest/ui 설치
npm add -D @vitest/uipackage.json에 추가
  "scripts": {
	"test:ui": "vitest --ui",
  }
실행
npx vitest --ui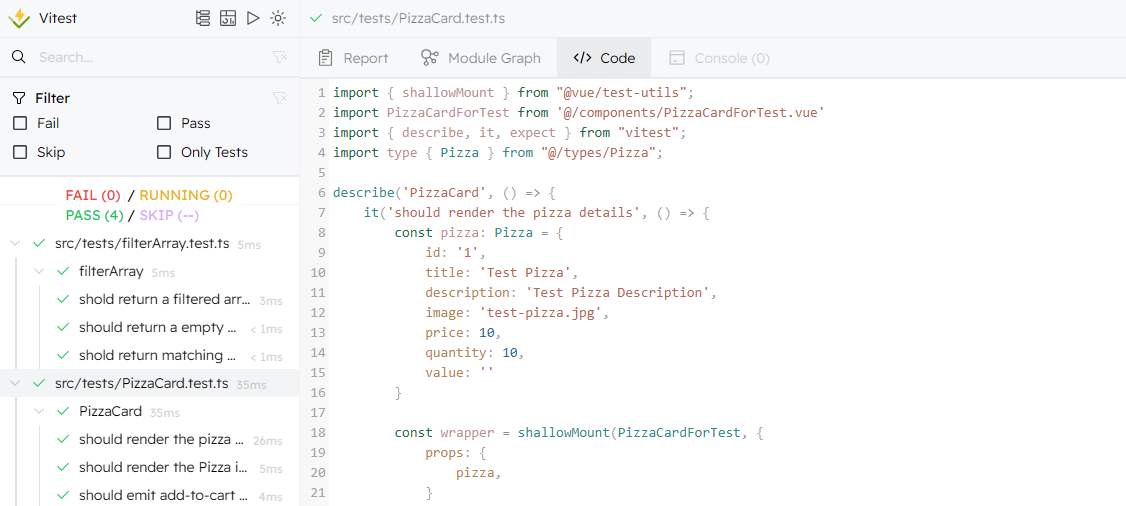
11.10 Vitest와 커버리지 러너
코드 커버리지는 테스트로 얼마나 많은 코드를 커버했는지 파악하는 기법
이스탄불 설치
npm add -D @vitest/coverage-istanbulvite.config.ts
export default defineConfig({
	//...
    test: {
    	//...
        coverage: {
        	provider: 'istanbul'
        }
    }
})
package.json
"scripts": {
	"test:coverage": "vite test --coverage"
}
실행
npx vitest --coverage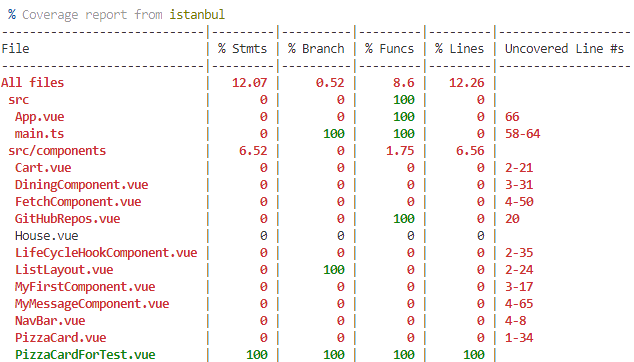
coverage/index.html

vite.config.ts에서 coverage 임계값 설정 가능 : 80~85%가 적절
11.11 PlayWrightJS를 이용한 엔드투엔드 테스트
설치
npm init playwright@latest
playwright.config.ts 인스턴스 주요 프로퍼티 옵션
- testDir : 테스트가 저장된 디렉터리
- projects : 테스트를 실행할 브라우저 프로젝트 목록
- worker : 테스트를 병렬로 실행할 워커 개수
- use : 테스트 러너 설정이 담긴 객체
- baseURL : 기본 URL 지정, 생략 가능
- trace : 실패한 테스트를 재시도할 때 추적 기능 활성화
실행
e2e/PizzasView.spec.ts
import { expect, test } from "@playwright/test";

test.describe('Pizza View', () => {
    // 테스트가 시작되기 전 페이지를 /pizzas로 이동
    test.beforeEach(async ({ page }) => {
        await page.goto('http://localhost:3001/pizzas')
    })

    test('should display the page title', async ({ page }) => {
        const title = await page.locator('h1')
        expect(await title.textContent()).toBe('Pizzas')
    })

    test('should search for a pizza', async ({ page }) => {
        const searchInput = await page.locator('[data-testid="search-input"]')
        await searchInput.fill('Hawaiian')

        // DOM에 렌더링이 끝나지 않은 상태에서는 false를 반환할 수 있으므로 기다리기
        await page.locator('[data-testid-article="Hawaiian"]').waitFor();

        expect(await page.isVisible('[data-testid-article="Hawaiian"]')).toBeTruthy()
    })

    // 테스트가 끝나면 페이지를 닫음
    test.afterEach(async ({ page}) => {
        await page.close()
    })
})
npx playwright test
npx playwright show-report
'독후감' 카테고리의 다른 글
| [클린 코드] 9. 단위 테스트 (1) | 2024.11.24 |
|---|---|
| [실전 코드로 배우는 Vue.js] Chapter 6. 외부 데이터 통합 (0) | 2024.11.12 |
| [실전 코드로 배우는 Vue.js] Chapter 2. Vue의 기본 작동 방식 정리 (2) | 2024.11.11 |
